Sunday, June 14, 2015

Transparent Shadow Puppets!

This lesson was combined with the previous shadow puppet lesson. At the end of making the two puppets they got to vote on whether to do a puppet show with the dragons or with these transparent puppets and they chose the dragons. However, these puppets still turned out amazingly well and they loved being able to play with them. 

Visual Art Standards: 

25.A.2d
26.B.2d

Objectives: 
Students will be able to identify the expressive qualities of symbol and story when creating a shadow puppet show for their dragons. 
Students will be able to demonstrate their understanding of designing, sketching, and constructing their shadow puppet using pre-determined tools. 

Materials: 
Acetate Paper (Clear sheet protectors can work in a pinch) 
Sharpies 
Scissors 
Hot Glue 
Bamboo Skewers 


Step 1: I had the students draw their design on a sheet of white paper.

Step 2: Once they were pleased with their drawing, they would put a piece of the acetate over the white paper and trace their design. 

Step 3: After they had their outlines done they no longer needed the sketch underneath and could set that aside. The students can then add details with the markers. I told my students that they needed to color it in completely and have no clear spots without marker. 

Step 4: Once they were completely colored they could cut them out carefully. This could be tricky because the acetate rips fairly easily. 

Step 5: Hot glue a bamboo skewer onto the back and have fun playing! Some of these required two bamboo skewers because they were slightly flimsy, but the skewers give the puppets stability. 
This lesson would possibly be a good introduction to puppets. The acetate was, skill-wise, easier to make than the dragons but they both turned out great!! 


Shadow Puppets!! (Dragons)

I have taught this lesson three times, and this is, by far, my favorite lesson to teach! Shadow puppets are very diverse and can be taught using many different subjects. For this particular lesson I focused on Cambodian shadow puppets and traditions. I taught the most recent lesson as a double-lesson. I taught one lesson on black opaque dragon puppets and another lesson on see-through puppets (seen in the next post). This lesson is highly engaging to students imagination and they were learning about other cultures while having fun!

Visual Arts Standards: 
25.A.2d
26.B.2d
26.B.2b

Objectives: 
Students will be able to identify the expressive qualities of symbol and story when creating a shadow puppet show for their dragons.
Students will be able to demonstrate their understanding of designing, sketching, and constructing their shadow puppet using pre-determined tools.
Students will be able to create a movable 2-dimensional dragon puppet.

Materials: 
Black Cardstock or Construction Paper
Hot Glue
Brads
Bamboo Skewers
Colored Pencil
Pencils
Erasers
Scissors

Step 1: This dragon needs to be drawn in 3 parts to make it movable. I started with drawing the head on a small piece of construction paper. This shape will be the head and the neck. I encouraged the students to add spikes and teeth and whiskers, whatever they wanted their dragon to have!

Step 2: To cut out this piece can be tricky if there are a lot of small spikes or details. Most of my students were able to cut theirs out with little to no assistance. To cut out the holes for the eyes they could fold it and cut a small half circle or color it in with white colored pencil.

Step 3: Using the width of the neck on the first piece as a guide, create the torso for the dragon. This can be the shape of an eggplant. As it gets nearer to the tail it can get slightly smaller. You can continue the spikes on the head and neck onto the torso. This piece should be easier to cut out.

Step 4: Just as we used the head as a guide for the torso, we will use the torso as a guide for the tail. The tail is the shape of a tear drop, coming to a point at the end.

Step 5: Once all pieces are cut out, color with colored pencil! The darker colors do not show up as well on the black paper but you will be able to see them lightly.

Step 6: As the students were coloring, I went around and poked 4 holes with a pencil. One at the base of the neck, one at each side of the torso, and one at the beginning of the tail.

Step 7: When they are done coloring they can attach these pieces with the metal brads!

Step 8: Hot glue bamboo skewers onto the back of the head and tail pieces and give it a whirl!

These are so much fun to make and they turn out amazingly well! The students wanted to take them home the second they made them!


When they had a chance to play with them, I had them sit down and talk with their peers about what kind of story they could have for their puppet show. They decided on a story called "Once Upon A Dragon" and they created a script and scenery for their show! They had a lot of fun making these and I had a lot of fun watching their imaginations soar.


Abstract Paper Self-Portraits

I love teaching students self-portraits because I feel that learning how to draw a portrait of yourself and studying your own face, can give you a better insight on yourself and your personality/identity. When I was teaching this lesson, before we delved into the abstract paper portraits, I taught them how to draw a proportionate face with pencil. I think that learning how to draw a realistic face can give more depth into how they can abstract the final piece.

My Inspiration:  

Visual Art Standards:
27.B.2
25.B.2

Objectives: 
Students will be able to understand how the different elements and principles of art can combine to create an abstract piece of art. 
Students will be able to identify how the arts can communicate different ideas and emotions. 
Students will be able to discuss the expressive colors and lines that they used to convey themselves in their portrait.

Materials: 
Paper Scraps
Construction Paper
Glue Sticks
Scissors
Pencils
Scratch Paper


Step 1: I showed the students a powerpoint on different artists who use abstraction in self-portraits such as Chuck Close, Vincent Van Gogh, and Pablo Picasso.

Step 2: The students started by cutting out a big shape for the head. This could be a realistic shape or an abstract shape. I showed them the ways in which color and line can be expressive.

Step 3: The students then went ahead cutting out the different features.

Step 4: While they were working I showed them the artist's abstract self-portraits again and encouraged them to make some abstraction in their faces.

Step 5: If there was a lot of empty space around the heads I encouraged the students to add some expressive shapes such as thought bubbles or music notes

Step 6: Write your name and show it off!

These were so fun and the students really grasped the idea of abstraction. I felt that it was necessary to show them the correct realistic facial proportions before diving into the abstract. I loved this lesson and so did the students! 

Watercolor Cakes

This lesson was inspired by my love for Wayne Thiebaud. I tried out this lesson that I found
 here ->   http://ksmaghini.blogspot.com/2011/05/good-enough-to-eat.html?m=1     with a group of 6-9 year olds and this is the result! Enjoy!


Materials: 
Watercolor Paper
Pencils
Sharpies
Watercolor Palettes
Watercolor Brushes
Salt
Rubbing Alcohol
Rulers

Visual Arts Standards: 
26.B.2d

Objectives: 
Students will be able to create a work of art using three different watercolor techniques.
Students will be able to incorporate more than three patterns into their cake layers.
Students will be able to experiment with different ways in which to manipulate watercolor paint.

Step 1:
Using pencil and a ruler, carefully create a border around the edges of the watercolor paper. I let my students make theirs between 1 and 2 inches.

Step 2:
In the middle of the bottom of the paper draw a line about a quarter of the way up the page and create the cake stand from this line. I made mine have a large skinny oval on the bottom edge and then a skinny cylinder in a middle and a large skinny plate on the top.

Step 3:
 Make the cake! Starting with the biggest layer, create smaller rectangles on top until their is no longer any room. The edges will have a stair-step pattern.

Step 4:
Add that pattern! I had my students create a different pattern in every layer of cake. Have fun with this part!

Step 5:
Add a topper! My students all added their favorite desserts to the top of their cakes. They had donuts and cherries and ice cream, oh my!

Step 6:
Outline all of those pencil lines in sharpie!

Step 7:
Carefully fill in the patterns with watercolor. Be careful putting two colors next to each other when they are wet, they will blend.

Step 8:
In the background, go to town using different watercolor techniques. I had salt, rubbing alcohol, and oil pastels available for my students. The salt and rubbing alcohol require the paint to be wet for it to work, so work quickly!

Step 9:
If you hadn't already add a border, I asked my students to create a repeating pattern in their borders and they could color it any way they wanted.

I hope you have as much fun with this lesson as I did!


Sunday, June 7, 2015

CLAY BIRDS NESTS

This lesson was inspired by the ever-helpful Pinterest. I saw a post with a similar lesson and I decided to do my own spin on it.

My Inspiration:
http://bowelementaryschoolart.blogspot.com/2013/06/clay-birds-in-nest.html


Materials:
Air Dry Clay (or regular clay if you have access to a kiln)
Paints
Simple clay tools (Forks and paintbrushes will do in a pinch)
Water
Lots of newspaper to minimize cleanup!

Visual Arts Standards: 
26.B.3d

Objectives:
Students will be able to create a pinch pot with the help of a short demonstration
Students will be able to expand their mind with new ways to use clay to create
Students will be able to understand how to create a piece from start to finish with thoughtful work


In my classroom, I would line the tables or desks with newspaper and then at the end of the day simply pick up the newspaper and the surfaces should be relatively clean.

Step 1: Start with a demonstration of how to make a pinch pot. These are fairly simple to make. You start with a ball of clay and slowly open up the middle with your thumbs and fore-fingers until you have a bowl shape.

Step 2: After everyone has successfully completed their pinch pots, they can take turns squeezing clay through a garlic press to create the twigs and other materials that nests are made of.

Step 3: A demonstration of score and slip will most likely be required here to show the students how to adhere the strips of clay to the pinch pot. Make sure to press down all of these pieces or they will break off in the drying process.

Step 4: Once the strips are all adhered, they will create between 2 and 4 eggs for their nest. Students will use the same score and slip method to attach these to the inside of the nest.

Step 5: The Bird! They will start off with a cone shape and then stretch out the head shape and the beak. The tale will be the tip of the cone. The bird will also need to be scored and slipped to adhere it to the inside of the nest next to or on top of the eggs.


These will take a few days to completely dry, but after that the students can paint these birds with a reference image they found on the internet with the help of a teacher.


Name Monsters!

My Inspiration:
http://suffieldart.blogspot.com/2012/10/5th-grade-name-monsters.html

Materials Needed:
Markers
Pencil
Colored Pencils
Scissors
Elmers Glue
Construction Paper

Visual Arts Standards:
25.B.2

Objectives: 
Students will gain a understanding of mirror symmetry
Students will be able to practice creating different textures with colored pencil
Students will be able to explore using different textures to create one cohesive piece

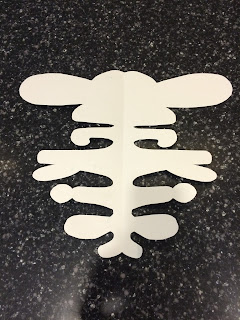
Step 1: Fold a paper in half vertically (Hot-dog style)

Step 2: Write name with bottom of the letters touching the fold. Cursive works best because it connects all of the letters


Step 3: Make bubble letters by surrounding the name. This can be done with markers or pencil.


Step 4: Cut out the form on the outer line.


Step 5: Open up the paper and turn it over so you can no longer see the name written on the paper in pencil.


Step 6: Using colored pencils and markers, create your monster!!

Step 7: Glue the monster to a bigger sheet of colored construction paper.


Ta-Dah!!

Monday, May 25, 2015

Why am I making a blog?

I am making a blog to showcase my journey of becoming an art educator. My personal art, my art lessons, and the results of both of these combined! Throughout this blog, I will provide how I created art lessons, how they turned out, and possible changes to help other art educators create similar lessons for their own classrooms. I learn and grow with every art lesson that I research and execute, and I hope to share this experience with all of you! Stay tuned for some crazy, fun art lessons!